How to Pull a Good Espresso at Home: the 7 Settings That Decide the Shot
 18 min read
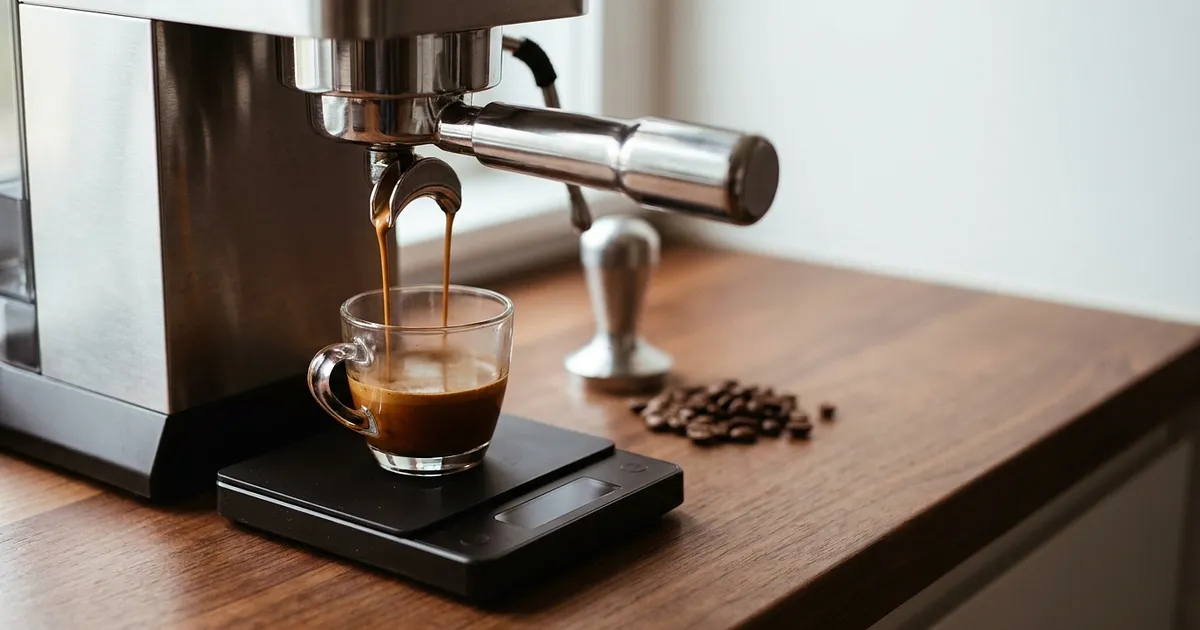
Does your espresso come out bitter, harsh, almost burnt? Or the other way round: sour, green, with that faint salty edge that sits on your tongue afterwards? Either way, the machine is almost never the problem. It's one of the seven settings below, and nine times out of ten it's the grind.
Last updated 08/08/2026
You don't pick an espresso. You dial it in. Espresso dial in means seven variables that move together and decide what lands in the cup: dose, grind, yield, time, temperature, tamping and water. Touch one and you've shifted the others. That's why a page ranking machines by pump pressure will never help you rescue a bad shot. That number isn't one of the seven, and we come back to it in setting 6.
This guide is about dialling in, the fine adjustment work. Not about which machine to buy, not about which grinder to buy. Those are two separate questions, and mixing them together is exactly what keeps people going in circles.
1. The dose: how much ground coffee goes in the basket
The dose is the mass of ground coffee you put in the portafilter basket. In grams. Not a scoop, not a mark on the grinder's doser.
The usual starting point is 18 g for a double basket, the specialty coffee reference (CoffeeGearHub). Your basket has its own nominal capacity, printed by the manufacturer, and that's what sets your real range. Not some universal figure.
How do you know your dose is wrong? If you aren't weighing it, you don't. A grinder's doser delivers a mass that shifts from coffee to coffee depending on bean density and roast freshness, so two "doses" that look identical by volume aren't identical by weight. What you get in the cup is a different coffee every morning without you having changed a thing.
And no, more coffee doesn't mean better coffee. A study published in Matter in January 2020 showed the opposite of common intuition: a finer grind paired with a high dose (the industry "standard" approach, around 20 g) tends to clog the coffee bed and cause uneven flow, which hurts reproducibility and extraction yield rather than helping them (Cameron et al., Matter, 2020).
So you fix a dose, you weigh it to 0.1 g, and you leave it alone until the grind is settled. It's the setting you lock first so you can adjust everything else. A kitchen scale with 1 g resolution won't do the job: the Vinabo Precision Scale 700g/0.01g runs about €7.99 (Last updated 08/08/2026, source Amazon.fr), and it's the cheapest way to stop guessing.
Not available in your region — closest match
View at Amazon (as of Aug 15)Affiliate link. Buying through it earns us a commission; the price stays the same for you.
Your basket sets the range
The basket that ships with most entry level machines is pressurised, double walled with a single exit hole. It's built to forgive a bad grind, and it forgives so well that it makes dialling in impossible: whatever you change upstream, the flow stays roughly the same. Comfortable, and a dead end.
A non-pressurised precision basket makes the other six settings readable. The HOTUT 51mm Espresso Filter Basket (precision basket) sits at about €5.59 (Last updated 08/08/2026, source Amazon.fr), rated 4.2/5 across 284 Amazon.fr reviews on the same date. Check your portafilter diameter first: 51 mm is common on entry level portafilters, which guarantees nothing about yours.
Not available in your region — closest match
View at Amazon (as of Aug 15)Affiliate link. Buying through it earns us a commission; the price stays the same for you.
2. The grind: the most important part of your espresso dial in
This is the setting you'll touch every single day, and the only one whose effect shows up in three seconds on the flow.
A finer grind increases the contact surface between water and coffee: more extracted aroma, more bitterness, slower flow. A coarser grind does the reverse, faster flow and a lighter, more acidic cup (MaxiCoffee Coffee Spirit, 2023). That's the whole mechanism. The rest is patience.
A grind setting is never written down as "fine" or "medium". It gets written on your grinder's own scale: "click 8", "2 clicks finer than position 12", "mark 1.4" on a micrometric collar. A stepped grinder moves in fixed increments and repeats easily from one day to the next. A stepless grinder allows tiny adjustments and forces you to record your positions, or you lose your starting point. Neither is better in itself, and which grinder to buy is a different question from this one.
The trap that ruins most dial-in sessions fits in one sentence: after each grind change you need to wait 2 to 3 shots before judging what's in the cup, because the first shot after an adjustment doesn't reflect the new grind yet (MaxiCoffee Coffee Spirit, 2023). Grounds from the old setting are still sitting in the grinder chamber. Move one step, purge, pull two shots, judge the third.
A word on pre-ground coffee, because the question keeps coming back. Pre-ground coffee locks you into one fixed particle size chosen by the manufacturer, so adjusting the grind, the main lever of espresso dialling in, becomes impossible in a way it isn't with freshly ground coffee (Coffee Review, Kenneth Davids). This isn't a freshness argument. The lever simply doesn't exist any more.
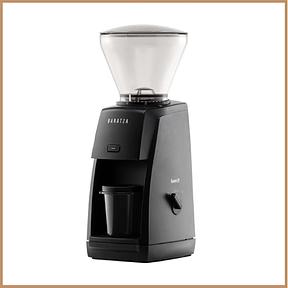
And if your grinder is a blade grinder, you don't have a setting either. You have a chopper. A burr grinder that can actually reach espresso fineness starts around €99, like the TIMEMORE Chestnut C3s PRO at that price (Last updated 08/08/2026, source Amazon.fr), rated 4.7/5 across 158 Amazon.fr reviews on the same date. You grind by hand, which takes noticeably longer than an electric grinder and doesn't amuse everyone.
Not available in your region — closest match
Baratza Encore ESP Moulin à Café à Meules Coniques
View at Amazon (as of Aug 11)Affiliate link. Buying through it earns us a commission; the price stays the same for you.
3. The yield (brew ratio): what ends up in the cup
The yield, or output ratio, is the relationship between what you put in and what you get out, measured by weight. Crema completely wrecks any reading taken off a line on the cup.
The specialty coffee reference brew ratio is 1:2: 18 g of ground coffee for 36 g of espresso in the cup, pulled in 25 to 30 seconds (CoffeeGearHub).
| Name | Ratio | Example (dose → cup) | What you get |
|---|---|---|---|
| Ristretto | 1:1 to 1:1.5 | 14 to 18 g → 14 to 27 g | Denser, more acidic, less bitterness |
| Espresso (normale) | 1:2 | 18 g → 36 g | The standard starting point |
| Lungo | 1:3 to 1:4 | 18 g → 54 to 72 g | More dilute, and more bitter if the grind doesn't coarsen |
Ranges from Podium Coffee Club and CoffeeGearHub, accessed 08/08/2026.
Behind those ratios sit two measurements that explain why the window is so narrow. The specialty coffee reference standard targets an extraction yield of 18 to 22 % of the coffee's solubles, with a cup TDS of 8 to 12 % for espresso, against 1.15 to 1.35 % for filter coffee, because the water volume is so much smaller (Coffee Bumper). Under 18 % extraction, it's sour and hollow. Above 22 %, it's dry and bitter.
The cup tells you your ratio is wrong before any instrument does. Watery and thin on a correct time? Your ratio ran long and you pulled towards a lungo without meaning to. Very short, syrupy, hard in the mouth? You've dropped towards ristretto territory.
What you change here is the target in the cup, not the grind. You stop the shot by weight, never by stopwatch. A scale that fits under the portafilter with a built-in timer does exactly that job: the TIMEMORE Black Mirror Basic 2 sits at about €47.20 (Last updated 08/08/2026, source Amazon.fr) and shows 4.3/5 across 105 Amazon.fr reviews on the same date. That's expensive for a scale. It's also the only instrument that measures two of the seven settings at once.
TIMEMORE Black Mirror Basic 2 - Balance à café avec minuteur
Not available in your region — closest match
View at Amazon (as of Aug 14)Affiliate link. Buying through it earns us a commission; the price stays the same for you.
4. Extraction time: a result, not a target
Here's the setting everyone treats backwards.
Extraction time isn't a goal you set directly. It's the outcome of the other settings: a 27 second espresso can be bad if the ratio is off, and a 32 second espresso can be excellent with a deliberately long pre-infusion on a lightly roasted single origin (Clive Coffee).
So the 25 to 30 second window isn't something you adjust. You observe it. You fix the dose, you fix the target in the cup, you start the shot, and the timer tells you whether your grind is too fine or too coarse.
Read it as a symptom:
under 20 seconds to reach 36 g means the grind is too coarse;
past 35 seconds means the grind is too fine, or the dose is too high for that basket;
somewhere in between but tasting bad means look elsewhere, usually at temperature or water.
A detail plenty of guides skip: the clock starts when you switch the pump on, pre-infusion included, not at first drip. Count from first drip and your 28 seconds are really 35, and you'll spend the morning fixing a problem that doesn't exist.
5. Temperature: between 90 and 96 °C
Water reaching the coffee should arrive between 90 and 96 °C (Coffee Bumper). The range is wide, and where you sit inside it changes the taste in a very predictable way.
Water temperature at the coffee directly affects extraction yield and the acidity to bitterness balance: the higher it goes, the more bitterness you perceive and the less acidity, and light roasts cope badly with an extraction temperature that runs too hot (Espressologie.fr, Sébastien Racineux, 2013). A dark roast takes the heat far better.
Hence the working rule: a light, acidic coffee wants the upper part of the range, a dark one the lower part. This is the setting to touch when your extraction time is right and the taste still isn't.
Then there's the honest problem: on an entry level thermoblock machine you have no temperature control at all. What you can do without buying anything comes down to three moves. Let it heat for twenty minutes instead of two, portafilter locked in. Run a blank flush right before you pull. Warm the cup. None of that replaces a PID, but it kills half the drift.
Sébastien Racineux adds a point most guides pass over in silence: changing temperature also shifts flow rate, so a temperature correction often forces a grind correction behind it. The seven settings aren't seven independent knobs.
6. Tamping and distribution: where nearly everyone gets it wrong
Two separate gestures, often confused. Distribution spreads the grounds evenly through the basket before you tamp. Tamping compacts that coffee bed.
Here's the counter-intuitive part: tamping force matters far less than people believe. Once the bed is level and free of voids, what counts is consistency from shot to shot, flatness, and a tamper that properly fills the basket diameter, not how hard you press, and that's the point the specialty coffee community keeps coming back to. The force figures in kilograms that circulate in videos don't trace back to any verifiable source, so they aren't repeated here, and an approximate number on this point would do nothing for you.
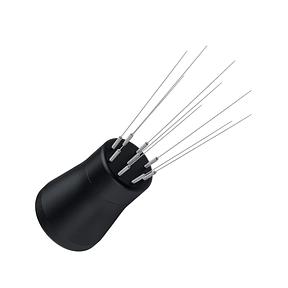
What genuinely ruins an extraction is channelling: a preferential path through the coffee bed that water races down, leaving the rest under-extracted. The fix is distribution, not force. That's where WDT comes in (Weiss Distribution Technique), which means breaking up clumps of grounds with fine needles before you tamp. The tool is the best effect-per-euro in the whole espresso kit: the HOTUT WDT Distribution Tool runs about €11.99 (Last updated 08/08/2026, source Amazon.fr), rated 4.6/5 across 231 Amazon.fr reviews on the same date.
Not available in your region — closest match
Normcore WDT Outil de Distribution V2 (9 aiguilles)
View at Amazon (as of Aug 10)Affiliate link. Buying through it earns us a commission; the price stays the same for you.
So what about the "19 bar" on the box?
This is where those numbers need settling, because it's the specification that misleads the most buyers.
The 15, 19 or 20 bar quoted on a machine's spec sheet describes the pump's maximum capacity at zero flow, not the pressure actually applied to the coffee: a pressure relief valve (OPV) brings it back to roughly 9 to 10 bar, whatever pump is fitted (Complete Home Barista). That 9 bar convention goes back to the patent Achille Gaggia filed in 1936.
| What the spec sheet says | What that number measures | What the coffee actually sees |
|---|---|---|
| 15 bar (pump) | Theoretical pump peak at zero flow | about 9 to 10 bar (extraction), set by the OPV |
| 19 bar (pump) | Theoretical pump peak at zero flow | about 9 to 10 bar (extraction), set by the OPV |
| 9 bar (extraction) | The working pressure at the puck | 9 bar |
Mechanism and values from Complete Home Barista, accessed 08/08/2026.
Put plainly: pressure is not one of your seven settings, unless your machine has an adjustable OPV, which is rare at entry level. A 19 bar machine and a 15 bar machine both extract at around 9 bar. What separates them lives somewhere else, in thermal stability and in the group head.
7. Water: the setting almost nobody adjusts
An espresso is very nearly all water. And it's the one setting out of the seven that most guides handle in a single line, something like "use low mineral water", without ever saying why.
The specialty coffee reference targets water around 150 ppm TDS, with a pH between 6.5 and 7.5 (Coffee Bumper). Two mechanisms are at work. Calcium and magnesium take part in extraction, magnesium binding more to the bright, acidic compounds and calcium to the ones that build body. Working against that, high alkalinity (the bicarbonates) neutralises the coffee's desirable acids and flattens the cup.
You won't find a numeric hardness or alkalinity range here. The values circulating on this point couldn't be traced back to a verifiable reference source, and publishing a plausible but unverified number would be exactly what this site criticises in product spec sheets. The qualitative principle holds up. The number can wait for a source.
What you can actually do: tap water varies enormously from one town to the next, and your water utility publishes the hardness of your supply. Go and read it before buying anything. If your water is very hard, a filter jug or a bottled low mineral water changes the cup, and it extends the life of the machine, because the same limescale is what furs up the thermoblock.
Typical symptom of a water problem: a flat cup with no bright acidity, whatever you do with grind and ratio. If you've turned the other six settings and never found any definition, look at the water.
The espresso dial in diagnostic table: which setting to change, and which way
This is the table most competing pages don't give you. One note before you use it: you change one setting at a time, and you wait 2 to 3 shots after every grind change before judging.
| Symptom in the cup | Likely diagnosis | Setting to change | Which way |
|---|---|---|---|
| Sour, green, salty; shot runs in under 20 s | Under-extraction | Grind (no. 2) | Finer, one step at a time |
| Bitter, dry, harsh; shot runs past 35 s | Over-extraction | Grind (no. 2) | Coarser, one step at a time |
| Sour even though the time is right (25 to 30 s) | Temperature too low | Temperature (no. 5) | Towards the top of the 90 to 96 °C range |
| Bitter even though the time is right | Temperature too high | Temperature (no. 5) | Towards the bottom of the 90 to 96 °C range |
| Multiple jets, flow drifting to one side | Channelling in the coffee bed | Distribution (no. 6) | WDT before tamping, tamp level |
| Almost nothing comes out, it drips | Grind far too fine, or dose too high | Dose (no. 1) then grind (no. 2) | 1 g less, then a coarser grind |
| Watery, no body, time is fine | Ratio running too long | Yield (no. 3) | Bring back to 1:2, stop by weight |
| Very short, syrupy, hard in the mouth | Ratio too tight | Yield (no. 3) | Stretch out towards 1:2 |
| Flat cup, no acidity, whatever the setting | Water too alkaline | Water (no. 7) | Filtered or low mineral water |
| Different result every morning with nothing changed | Dose not weighed, uneven distribution | Dose (no. 1) | Weigh to 0.1 g, every shot |
The order you correct in matters as much as the correction itself: dose first, then grind, then yield. Temperature and water come last, once the first three are stable. Otherwise you're correcting one setting with another and going round in circles.
Where to go from here
Two things to take away from this seven-step espresso dial in. First: they form a system, so correcting temperature often forces a grind correction behind it. Second: the only discipline that makes you better is one change at a time, with a weighed dose that doesn't move.
And if all of this mostly makes you want to adjust nothing at all, that's a fair answer. A bean-to-cup machine makes these trade-offs for you, at the cost of control: our comparison of bean-to-cup coffee machines starts from that trade-off rather than from the number of programmes.
The figures on this page will be rechecked at the next update, in particular the Amazon.fr prices, which move from week to week, and the water hardness ranges, still waiting on a citable source.
All products from this post
The ones we named above are marked; the rest are alternatives in the same category.
Not available in your region — closest match
Amazon Basics Fast Electric Coffee Grinder for Home Use, Easy to Use Coffee Bean and Spice Grinder with Heavy-Duty Stainless Steel Grind Blades
View at Amazon (as of Aug 14)
Not available in your region — closest match
Anker Powerbank, 20.000mAh tragbares Ladegerät mit integriertem USB-C-Kabel, 87W Max Schnellladung, kompatibel mit MacBook, iPhone, Samsung und mehr
View at Amazon (as of Aug 15)
Not available in your region — closest match
Baratza Encore ESP Moulin à Café à Meules Coniques
View at Amazon (as of Aug 11)
Not available in your region — closest match
Normcore WDT Outil de Distribution V2 (9 aiguilles)
View at Amazon (as of Aug 10)
Not available in your region — closest match
Anker Powerbank, 20.000mAh tragbares Ladegerät mit integriertem USB-C-Kabel, 87W Max Schnellladung, kompatibel mit MacBook, iPhone, Samsung und mehr
View at Amazon (as of Aug 15)Affiliate notice: As an Amazon Associate, we earn from qualifying purchases. Product prices and availability are subject to change.
Frequently Asked Questions
What grind size for espresso?
Much finer than filter, close to fine table salt, though no verbal description beats a timer. The useful marker is functional: your grind is right when your fixed dose delivers your target yield in 25 to 30 seconds. Write the setting down on your grinder's own scale, never as "fine" or "medium".
What is the right brew ratio for espresso?
The specialty coffee reference is 1:2, so 18 g of ground coffee for 36 g of espresso in the cup. A ristretto drops towards 1:1 or 1:1.5, a lungo climbs towards 1:3 or 1:4. These are weights, never volumes, because crema makes any visual reading useless. Start at 1:2.
How long should an espresso shot take?
Between 25 and 30 seconds, but that isn't a number to aim at. It's the result of your dose, your grind and your ratio. A 32 second shot can be excellent and a 27 second shot can be poor. Read the timer as a grind diagnosis, and start it when the pump starts, pre-infusion included.
What water temperature for espresso?
Between 90 and 96 °C at the coffee. The hotter it runs, the more bitterness you perceive and the less acidity comes through. Light roasts cope badly with the top of that range. On a machine with no temperature control, a twenty minute warm-up with the portafilter locked in, plus a blank flush right before you pull, removes a good part of the drift.
Why is my espresso too bitter?
Nine times out of ten because it's over-extracted: the grind is too fine, water sits on the coffee too long and drags out the bitter compounds. Go one step coarser, purge, then judge the third shot. If your time already sits between 25 and 30 seconds and the bitterness stays, drop the temperature within the range.
Does a 19 bar machine make better espresso?
No. The 15, 19 or 20 bar printed on the box describes the pump's theoretical peak at zero flow, not the pressure applied to the coffee. A pressure relief valve brings extraction back to around 9 to 10 bar whatever pump is fitted. That 9 bar convention goes back to Achille Gaggia's patent of 1936.
Do you need to tamp hard?
No, and it's the move beginners spend the most effort on for the least gain. Once the coffee bed is level and free of voids, consistency, flatness and a tamper of the right diameter matter far more than how hard you press, which is what the specialty coffee community emphasizes most. Distribution before tamping matters more still.
Sources
- CoffeeGearHub coffeegearhub.com
- Cameron et al., *Matter*, 2020 sciencedaily.com
- MaxiCoffee Coffee Spirit, 2023 coffee-spirit.maxicoffee.com
- Coffee Review, Kenneth Davids coffeereview.com
- Podium Coffee Club podiumcoffeeclub.com
- Coffee Bumper coffeebumper.com
- Clive Coffee clivecoffee.com
- Espressologie.fr, Sébastien Racineux, 2013 espressologie.fr
- Complete Home Barista completehomebarista.com