How to Steam Milk: the Texturing Technique, Step by Step
 16 min read
Most guides describe the destination — "microfoam", "wet paint", "glossy milk" — and almost none describe what your hands are actually doing. That gap is where beginners get stuck, and they nearly all get stuck in exactly the same way.
The classic failure is not impatience and it is not cheap equipment. It is doing both jobs at once: pulling air into the milk for the whole time the steam is on. What comes out is stiff, dry, bubbly foam that separates from the liquid milk within half a minute and leaves a dry white collar around the rim of the cup.
Steaming splits into two distinct phases, one after the other. First you introduce air, briefly, with the tip near the surface. Then you shut that door and spin the milk so the whirlpool shears the big bubbles down into foam too fine to see. This guide walks through both phases with the sound and touch cues that tell you where you are without looking into the jug.
What is actually happening in the jug
Two mechanisms overlap, and confusing them explains half of all bad milk.
The first is mechanical: steam leaving the tip creates a low-pressure area at the surface and drags air down into the milk. That is what creates volume — and it only works when the tip sits a few millimetres below the surface. Push it a centimetre deeper and the air intake stops completely.
The second is thermal: as the milk warms, whey proteins unfold and coat the surface of every air bubble, which is what makes the foam hold together. According to Perfect Daily Grind (December 2018), that unfolding starts around 40 °C (104 °F); foam made between 30 and 40 °C is unstable, and it becomes markedly more stable by 60 °C (140 °F).
The two mechanisms have different windows. Air has to go in early, while the milk is still cold and thin. Stabilisation happens afterwards, on the way up in temperature. Hence the order: air first, texture second. Doing both together means injecting air into already-warm milk, where it forms coarse bubbles that nothing will refine.
Worth stating plainly: no public standard fixes "the" steaming temperature. The ranges you will read everywhere come from trade publications and working baristas, not from a citable specification. That is why this guide names a source and a date for every figure rather than presenting a number as a rule.
The jug is the only real prerequisite
You can steam decent milk on a modest machine. You cannot steam it in a mug, a cup or a saucepan. A milk jug is not decoration: the cone shape and the pointed spout are precisely what let the whirlpool form and what let you pour a controlled stream afterwards.
Three properties matter, in this order:
| Property | Why it matters |
|---|---|
| Thin-walled stainless steel | The wall conducts heat to your palm — your free thermometer |
| Rounded base, conical body | Milk climbs the wall and drops down the middle: that is the whirlpool |
| Fine, pointed spout | A wide spout gives a wide stream, which is no control at all |
The reference size for a single drink is 350 ml (12 oz). De'Longhi's stainless jug De'Longhi DLSC060 Pichet à Lait 350 ml, Acier Inoxydable has the classic geometry — a clean cone, a pointed spout, a thin wall — and works the same on a portafilter machine or a bean-to-cup steam arm.

Not available in your region — closest match
View at Amazon (as of Aug 15)Affiliate link. Buying through it earns us a commission; the price stays the same for you.
A budget jug does the same job
There is no reason to start at the top of the range. Entry-level 304 stainless jugs do identical work, and many ship with a latte-art pen you will not need yet — but the internal graduation marks are genuinely useful, because they stop you overfilling. The graduated 350 ml model Pichet à lait gradué 350 ml en acier inoxydable 304 avec stylo à latte art is representative of the category.
If you upgrade later it will be for spout geometry, not for materials. The rest of the starter kit is covered in our guide to essential barista accessories.
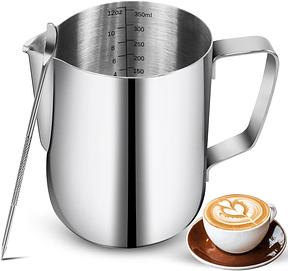
Pichet à lait gradué 350 ml en acier inoxydable 304 avec stylo à latte art
View at AmazonAffiliate link. Buying through it earns us a commission; the price stays the same for you.
Two drinks at once: move up to 600 ml
A 350 ml jug comfortably textures enough milk for one drink. Two cappuccinos served together need more milk, and an overfilled jug will not spin — the surface has nowhere to drop. A 600 ml (20 oz) jug Tianher pot à lait 600 ml en acier inoxydable pour barista solves it, at the cost of slightly more thermal inertia. That inertia is a beginner's friend: the milk heats more slowly, so you get a wider window.
Filling rule, at either size: fill to the base of the spout, no higher. The milk is about to gain volume; start it at the top and it goes over the side.
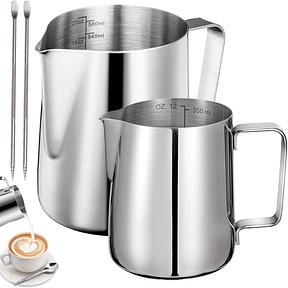
Tianher pot à lait 600 ml en acier inoxydable pour barista
View at AmazonAffiliate link. Buying through it earns us a commission; the price stays the same for you.
Before you open the steam: three non-negotiables
Cold milk, cold jug. Milk comes out of the fridge and goes back in between attempts. Lukewarm milk shortens the stretching window — you hit your cut-off temperature before you have made any volume. A jug still warm from the dishwasher does the same thing. If you are running several attempts, rinse the jug under cold water between each.
Purge the wand. Open the steam for two seconds into a cloth or over the drip tray before the tip goes anywhere near the milk. The wand holds condensed water; skip the purge and you tip that water into your jug and dilute the milk. On a single-boiler machine the purge doubles as your check that the steam has actually gone dry.
Position first, then open. Place the tip, then turn on the steam — never the other way round. Lowering an open wand into milk sprays it everywhere and starts the air intake in the wrong place.
Stage 1 — stretching: the hiss
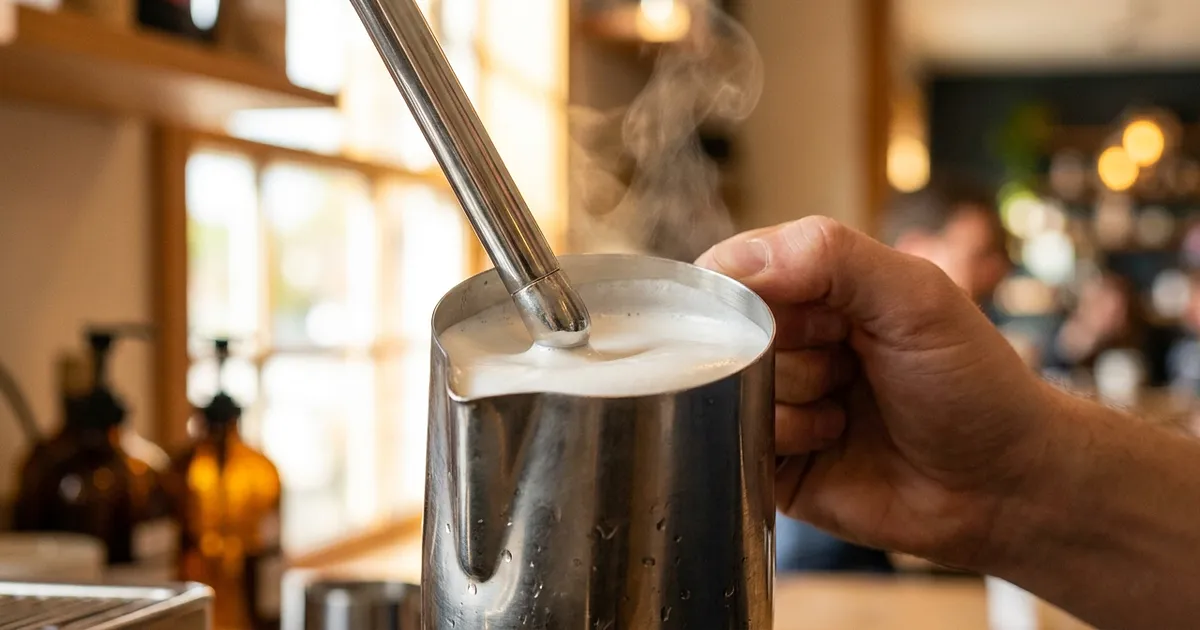
Starting position: the tip just under the surface, off-centre, roughly halfway between the middle of the jug and the wall, with the jug tilted slightly. Open the steam valve fully, in one movement — a half-open valve gives soft steam that heats without texturing.
You want a steady, spaced hiss: "tsch… tsch… tsch". That is the sound of air going in. Two calibration cues:
A shrill, continuous tearing sound means the tip is too high and you are gulping air. Raise the jug very slightly.
No hiss at all, just a dull rumble means the tip is too deep and no air is entering. Lower the jug by a millimetre or two.
Keep it short. Three to five seconds of hissing is enough for a cappuccino. The reliable cue is not the clock but the volume: when the level has risen by about a third, stretching is done. For a flat white, less again — one to two seconds.
Through this whole phase the milk is still cold. That is deliberate: all the air must be in before the temperature climbs. If you can still hear hissing once the jug starts to feel warm, you are late, and the foam will be coarse.
Stage 2 — texturing: the whirlpool
Without cutting the steam, push the jug up a few millimetres. The hiss stops immediately. From here no more air enters: whatever you have, you already have. The rest of the job is making it invisible.
Now find the angle that sets the milk spinning. Move the tip toward the wall and tilt the jug until you can see the milk turning on itself in a funnel. That whirlpool is the whole trick: it continuously drags large surface bubbles down to the tip, where the shear of the steam breaks them into tiny ones. That is what turns bubbly foam into glossy microfoam.
Visual cues:
The whirlpool should be visible and steady, not a faint shimmer.
The surface should turn smooth and glossy, with no bubble you can pick out by eye.
If big bubbles sit on the surface and refuse to go down, the spin is too weak: adjust the angle, not the depth.
This phase lasts longer than the first, and it is what carries the milk up to temperature.
When to stop: the temperature
This is the one parameter in this guide that you can actually measure.
The working range published by Perfect Daily Grind (December 2018) is 60–63 °C (140–145 °F), with foam already markedly more stable from 60 °C (140 °F). The ceiling is chemistry: R. L. J. Lyster in the Journal of Dairy Research (1970) measured β-lactoglobulin denaturation in heated milk from 68 °C (154 °F) upward. Past that the protein stops stabilising foam properly and the milk starts to taste cooked.
The instrument-free cue is your palm: hold it flat against the jug through the whole of stage 2. While you can keep it there, keep going. The moment you have to pull it away, cut the steam. The cue is surprisingly reliable, because skin becomes uncomfortable in roughly the same band where the milk starts to degrade.
If you would rather have the number than the sensation, a clip-on probe thermometer Thermomètre à lait avec sonde inox 175 mm et clip de fixation fixes to the rim and stays put through the whole operation. The clip is the important part: a probe held by hand lifts out of the milk as soon as the whirlpool accelerates and reads nonsense.
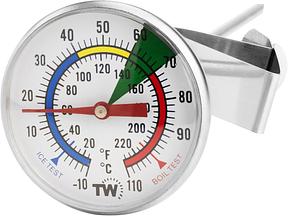
Thermomètre à lait avec sonde inox 175 mm et clip de fixation
View at AmazonAffiliate link. Buying through it earns us a commission; the price stays the same for you.
A simpler thermometer, no clip
If your jug has a thick rim or a shape that will not take a clip, a plain dial milk thermometer Westmark thermomètre à lait à cadran does the job, as long as you hold it upright and read it at the end rather than continuously.
Either one is mostly there to calibrate your hand for the first few weeks. After thirty jugs or so the palm is enough and the thermometer lives in a drawer.
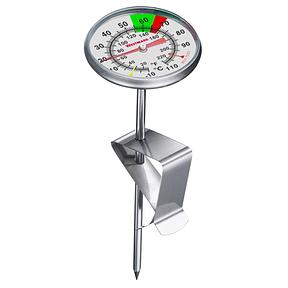
Westmark thermomètre à lait à cadran
View at AmazonAffiliate link. Buying through it earns us a commission; the price stays the same for you.
Finishing the jug: tap, swirl, pour
The texture is not finished when the steam stops. Three moves, in this order, without dawdling.
- Close the steam, then lift the jug out. Never the reverse: pulling out an open wand sprays milk across the machine.
- Tap the jug once or twice flat on the counter. Residual bubbles rise and pop.
- Swirl the milk in a circular motion until the surface is glossy and uniform again.
Then pour immediately. Even good foam separates within a minute or two: the liquid drops, the foam rises, and you end up with exactly what you were trying to avoid. If you have to wait, swirl again right before pouring.
One detail that matters: textured milk goes onto an espresso that has already been pulled, not the other way round. If the espresso waits, the espresso is what degrades. Extraction order and settings are covered in our guide to espresso dial-in settings.
Purge and wipe the wand — afterwards, every time
This takes five seconds and it is the step everyone skips.
The moment the jug is down: wipe the wand with a dedicated damp cloth, then open the steam for a second or two to blow out the milk drawn back into the tip. Milk dries fast and bakes onto hot steel; a wand cleaned cold the next morning needs soaking, a wand purged hot needs nothing.
A partly blocked tip is one of the commonest reasons a whirlpool that formed last week refuses to form today. Before you blame your technique, hold the tip up to the light.
The wand cloth is a dedicated cloth, kept damp, and used for nothing else.
Flat white or latte? The difference is stage 1
The two drinks are made with the same technique and differ almost entirely in how long you stretch.
| Drink | Stretching | Resulting milk |
|---|---|---|
| Cappuccino | 3–5 seconds | Thicker foam layer, drier, more lift |
| Latte | 2–3 seconds | Moderate foam, larger volume of milk |
| Flat white | 1–2 seconds | Barely any lift, dense glossy microfoam throughout |
A flat white is not a small latte and it is not a latte with less foam floating on top. The milk itself is textured differently: you stretch it barely at all, so what you pour is dense throughout rather than layered. Which is also why a flat white punishes bad texturing more visibly — there is no foam cap to hide behind.
Common failures and what causes them
| What you get | Most likely cause |
|---|---|
| Stiff, dry foam separated from the milk | Air introduced throughout, not just at the start |
| Almost no volume | Tip too deep from the outset; no hiss in stage 1 |
| Big bubbles you cannot get rid of | No whirlpool in stage 2; wrong tip angle |
| Cooked taste, foam that collapses | Cut the steam too late, past the denaturation band |
| Milk sprayed out of the jug | Steam opened before positioning, or jug overfilled |
| Good foam that splits in the cup | Poured too late without swirling first |
If the whirlpool never comes, it may not be you
This needs saying, because plenty of beginners grind away at a problem that is not theirs: a machine's steam power changes the technique, and on some machines a whirlpool is hard to get however good your hands are.
On a single-boiler or thermoblock machine, one heating element has to switch between brew mode and steam mode. The steam is wetter and there is less of it than on a dual boiler: the output may be plenty for 150 ml of milk and not enough for 350 ml. Two practical consequences:
Texture smaller volumes. A half-full jug spins where a full one sits inert.
Wait for the steam-ready temperature before you start, and purge until the jet runs dry.
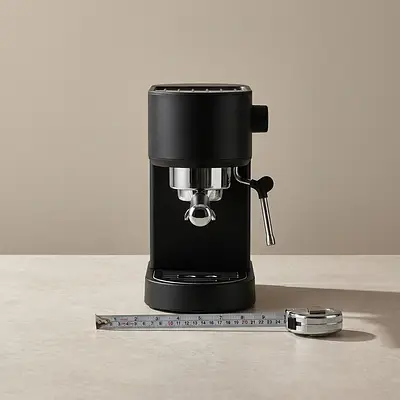
Compact portafilter machines in this class, such as De'Longhi's Dedica Style De'Longhi Dedica Style EC685.W, are a fair example of the trade-off: they texture small volumes perfectly well, but they need a clean tip and a sensibly sized jug to do it. How this type of machine works overall is covered in our manual espresso machine beginner's guide.
If you have purged, cleaned the tip and cut the milk volume and still get no whirlpool, you have hit a hardware limit. That is not a technique fault and no amount of practice will fix it.
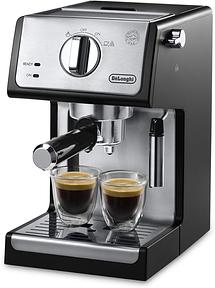
Not available in your region — closest match
View at Amazon (as of Aug 14)Affiliate link. Buying through it earns us a commission; the price stays the same for you.
No steam wand? The frother route
Plenty of automatic bean-to-cup machines have no manual steam arm, or only an assisted wand that does the work for you. That is a perfectly legitimate path and there is no point pretending otherwise — it simply does not produce the same thing.
An induction milk frother heats and whisks the milk in a bowl, with no steam involved. Induction models such as Severin's Spuma 500 SEVERIN Spuma 500 mousseur à lait à induction 500 W bring the milk up to temperature and produce dense, consistent foam, usually with a hot/cold setting. What you lose is continuous control: the texture is whatever the appliance decides, and it is generally airier and less "wet paint" than wand-textured milk.
Put simply: a frother is excellent for a reliable everyday cappuccino and limited if latte art is the goal. The rest of this guide's rules — cold milk, fill to the base of the spout, pour immediately, tap and swirl — still apply either way.
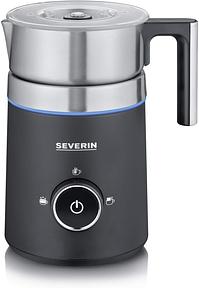
SEVERIN Spuma 500 mousseur à lait à induction 500 W
View at AmazonAffiliate link. Buying through it earns us a commission; the price stays the same for you.
The milk itself
One last factor, routinely ignored: not all milk textures alike. Whole cow's milk gives the most stable and most forgiving foam, because it carries both the proteins that stabilise and the fat that supplies mouthfeel. Semi-skimmed foams abundantly but drier.
Plant drinks behave differently depending on their formulation: the ones sold in a "barista" version contain added stabilisers precisely so they survive steam. A standard version can split or curdle on contact with heat. If you are learning, start with whole milk — at least then you know that whatever goes wrong came from your hands and not from the carton.
All products from this post
The ones we named above are marked; the rest are alternatives in the same category.
Not available in your region — closest match
Anker Powerbank, 20.000mAh tragbares Ladegerät mit integriertem USB-C-Kabel, 87W Max Schnellladung, kompatibel mit MacBook, iPhone, Samsung und mehr
View at Amazon (as of Aug 15)
Affiliate notice: As an Amazon Associate, we earn from qualifying purchases. Product prices and availability are subject to change.
Frequently Asked Questions
How long should the stretching phase last?
Three to five seconds of hissing for a cappuccino, one to two for a flat white. The reliable cue is volume rather than time: stop introducing air once the level has risen by roughly a third. On a low-powered machine this phase is mechanically longer, which is normal and not a fault.
What temperature should I stop steaming at?
Perfect Daily Grind gives a working range of 60 to 63 °C (140–145 °F), with foam markedly more stable from 60 °C. Above that, whey protein denaturation sets in: Lyster, in the Journal of Dairy Research in 1970, measured β-lactoglobulin denaturation from 68 °C (154 °F) upward. No public standard fixes an official figure.
Why is my foam full of big bubbles?
Because air kept going in throughout, or because there was never a whirlpool to shear the bubbles down. Both faults have the same fix: stretch briefly right at the start, then push the tip deeper to shut off the air and hunt for the angle that sets the milk spinning.
What is the difference between flat white and latte milk?
Mostly the length of the stretching phase. A latte gets two to three seconds of air and carries a moderate foam layer; a flat white gets one to two seconds and is dense and glossy all the way through rather than layered. Same technique, different air.
Can I steam milk without a steam wand?
Yes, with an electric or induction frother, or with a bean-to-cup machine's automatic wand. The foam is consistent and fine for an everyday cappuccino, but it is generally airier than wand-textured milk and less suited to latte art.
Should I purge the wand before or after?
Both, for different reasons. Before, to clear the condensed water that would dilute your milk and to confirm the steam has gone dry. After, to blow out the milk drawn back into the tip before it dries. Wipe the wand with a damp cloth immediately after every use as well.
Can I re-steam milk left in the jug?
No, not for a second textured drink. Milk that has already been heated has lost some of its ability to take in and hold air: the second pass gives coarse foam that collapses quickly. Start again with cold milk in a cold jug every time.