Bitter or sour espresso: how to diagnose the shot by taste
 16 min read
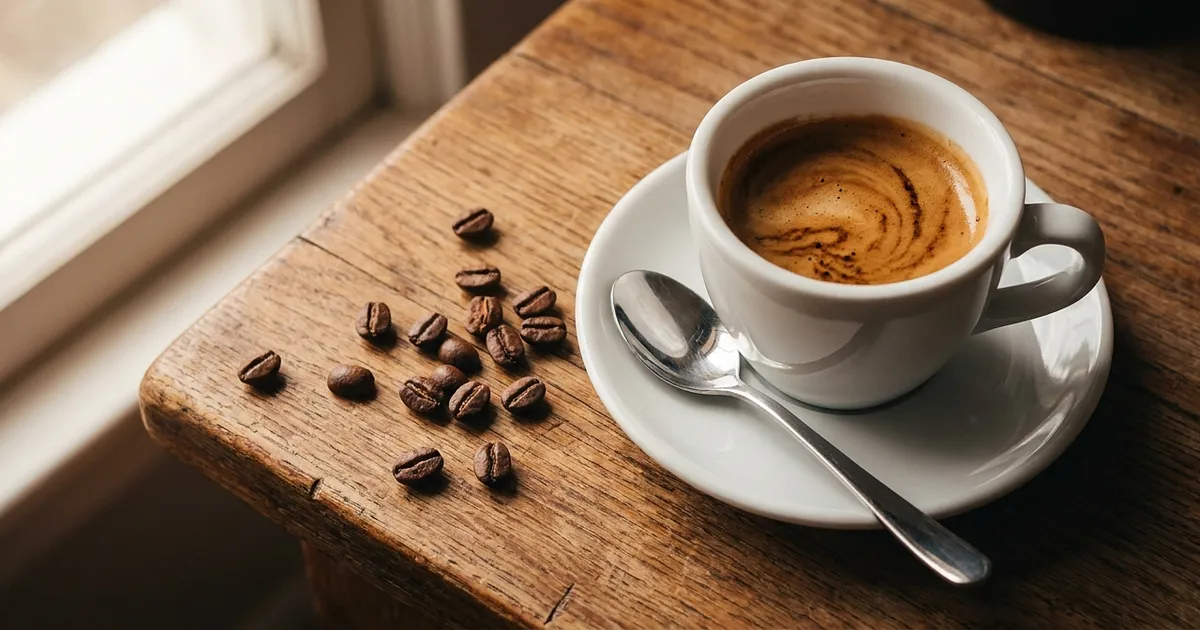
The rule everyone repeats fits on one line. Sour means under-extracted, bitter means over-extracted. It's correct, and it isn't enough. It leaves out the two cases that keep people going in circles for weeks: the shot that's sour and bitter at once, and the shot that stays bitter whatever you change, because the fault was never in the machine. It's in the bag.
The most expensive reflex in this hobby is grinding finer after every disappointing shot. That works about half the time. The other half it makes the problem worse, and since the taste changes anyway, you think you're getting somewhere.
This guide runs the other way round. Read the cup, name the direction of the fault, then move one variable. The numbers below come from Specialty Coffee Association protocols and a food-chemistry study cited further down. None of it is an in-house tasting.
Bitter and sour aren't two flavors, they're two directions
Extraction is a continuum. Water dissolves coffee compounds in a roughly stable order: acids and some of the sugars first, then the bitter compounds and the tannins. A shot that stops too early never gets past the top of that list. One that runs too long goes too far down it.
The Specialty Coffee Association puts the useful window between 18% and 22% extraction yield, meaning the percentage of the dry coffee mass that ends up dissolved in the cup. Below 18%, the cup is described as sour, salty, flat. Above 22%, it's described as bitter, dry, astringent. Those are the boundaries of the SCA's brewing control chart, not a measurement taken here.
You don't need a refractometer to use them. What those two numbers really say is that there's no such thing as too much flavor. There's only a direction you went too far in, or not far enough.
| What you taste | Likely direction | What it means |
|---|---|---|
| Sharp acidity, salty, short empty finish | Under-extraction | Water didn't dissolve enough: grind too coarse, time too short |
| Harsh, drying, scrapes the tongue afterwards | Over-extraction | Water dissolved too much: grind too fine, time too long, water too hot |
| Sour and bitter in the same sip | Uneven extraction (channeling) | Water tunneled through the puck: part of the bed stripped, the rest barely touched |
| Bitter but smooth, no aggression, dark chocolate or burnt | Probably the bean | Dark roast: the bitterness is in the raw material |
| Thin, watery, little body, no sharp fault | Ratio too long | Too much water pulled for the dose |
That third row is what the "sour equals under, bitter equals over" rule doesn't cover, and it's the most common outcome on a portafilter machine with sloppy puck prep.
"Acidic" is not "sour", and collapsing the two costs you weeks
English hands you two words for this, and almost nobody keeps them apart. People say a shot is "too acidic" when what they mean is that it's sour. Those are opposite verdicts: one is a quality you paid for, the other is a defect. Get them backwards and you spend a month turning the grinder the wrong way.
The coffee flavor wheel published in 2016 by the SCA with World Coffee Research splits two families explicitly in its inner ring: Sour/Fermented on one side, Fruity on the other. Not two intensities of one thing. Two separate categories. The first covers acetic and fermented sensations, vinegar, aged cheese. The second covers citrus, red berries, stone fruit.
Translated to your cup:
Pleasant acidity has fruit behind it. Lemon, apple, red berries, sometimes a sweetness that arrives a beat later. It gives the shot length and shape. It's a quality, and it's what people chase in a light-roast Ethiopian or Kenyan.
A sour espresso has no fruit. It's sharp without being aromatic, it hits the front of the tongue, it stops dead and leaves nothing. That one is an extraction fault.
The trap works like this. Someone arriving from strong filter coffee or a dark Italian blend finds every correctly extracted light roast "acidic", so they grind finer to kill it. And it works: past 22% extraction the bitter compounds bury the acids and the cup goes uniform. Except the fruit died along with the sourness, and what's left is a flat brown drink they'll find just as disappointing.
The test that settles it: add two or three grams of hot water to dilute the shot slightly. If the acidity opens up into fruit, it's acidity, and it's good. If it stays sharp and empty, it's sour, and you need to extract more.
Trap one: the same grind setting can produce both faults
This is the point that breaks the simple rule, which is why it comes before the decision tree.
Grinding finer raises the puck's resistance and therefore, normally, contact time and extraction. Up to a point. Past it the bed is too dense to soak through evenly, so pressurized water takes the path of least resistance and carves itself channels. That's channeling.
What comes out isn't "more extracted". It's two coffees mixed: the grounds lining the channels, stripped well past the useful window, and the rest of the puck, which the water barely touched. In the mouth that's the disorienting shot that's bitter and sour at once, usually described as hollow or unbalanced.
If you don't know that mechanism exists, the diagnosis goes straight into the wall. You taste bitterness, call it over-extraction, go coarser, and the acidity that was already sitting there takes over. So you go finer again. Round and round.
Three signs that separate channeling from plain over-extraction:
- The flow is erratic. It spits, it suddenly speeds up, or it comes out as two streams that never join.
- The time is short even though the grind is fine. A tight grind that lets water through quickly is water that went past the coffee rather than through it.
- The spent puck shows a crater or a hole when you knock it out, or it stays soaked in the middle.
The correction isn't the grind setting. It's puck prep: break the clumps, distribute the grounds evenly, tamp flat. Which is exactly what the tools further down are for.
Trap two: a dark roast is bitter by chemistry, not by setting
The second case where adjusting the machine gets you nowhere.
Food-chemistry work led by Thomas Hofmann at the Technical University of Munich, presented at the American Chemical Society meeting in 2007, identified two families of compounds behind coffee bitterness. Not caffeine, whose role turned out to be secondary. Roasting converts the chlorogenic acids in green coffee first into chlorogenic acid lactones, which carry the soft bitterness of a light-to-medium roast. Push the roast further and those lactones break down into phenylindanes, described in that work as carrying a harsh, lingering bitterness and present in larger quantities in dark roasts.
Chemical bitterness is already in the bean before a drop of water reaches it. Going coarser dials it back a little, because you're extracting less of everything, but you pay with a thin shot and the burnt character stays put.
How to tell bean bitterness from setting bitterness:
It's smooth and even, not rough, not drying. Over-extraction dries your mouth out; a dark roast is bitter without being abrasive.
It's stable. Move the grind one step: the time shifts, the texture shifts, and the bitterness barely registers the change.
The beans look very dark and oily. A greasy film on the surface is a visual marker of a hard roast.
Then the only useful correction is the bag. It's also why you shouldn't dial in for the first time on an unfamiliar, very dark coffee: you're adjusting blind against a bitterness you can't move.
The decision tree, in the order you have to follow it
One variable at a time, remeasuring between every change. Change two things together and the result is unreadable.
Step 0: measure before you judge. Without the dose in, the mass out and the time, you're not diagnosing, you're commenting. SCA espresso protocols take a 1:2 ratio by mass as the reference, one gram of ground coffee for two grams of espresso in the cup, with water between 90.5 °C and 96 °C and an extraction pressure of about 9 bar. The classic espresso definition the SCA works from puts the shot between 20 and 30 seconds. Write those three numbers down for every shot.
The figure on the machine's box, 15 bar, 19 bar, is a maximum pump pressure quoted by the manufacturer. It isn't the pressure your coffee extracts at, and it enters none of the steps below.
Step 1: is the flow steady? Watch the portafilter run. Spitting, diverging jets, a sudden acceleration: that's channeling, go to step 2. A steady syrupy stream that blondes gradually: go to step 3.
Step 2: fix the puck prep, not the grind. Break the clumps with a distribution tool, level the surface, tamp flat without leaning on it. Pull again and remeasure before changing anything else.
Step 3: is the brew ratio on target? Pull a lot more than twice the dose and the cup comes out diluted and often bitter at the tail, because the excess water keeps stripping the puck. Pull a lot less and it's concentrated and sour. Bring the ratio back near 1:2 before you touch the grinder.
Step 4: is the time consistent with the ratio? At a correct ratio, a time clearly too short means the grind is too coarse; clearly too long means it's too fine. This is the only point where the grinder enters, and it moves one step at a time.
Step 5: it's the bean. Ratio on target, time on target, flow steady, and the shot is still bitter and smooth: the fault has left the machine. Change coffee, or accept that this bag gives what it has.
| Variable | Direction | Effect on extraction | When to touch it |
|---|---|---|---|
| Puck prep (WDT, tamping) | More even | Removes channels, evens the bed | First, as soon as the flow is erratic |
| Brew ratio (yield / dose) | Longer | Stronger extraction, lighter body | Before you touch the grinder |
| Grind | Finer | Stronger extraction | One step at a time, after the ratio |
| Water temperature | Hotter | Stronger extraction | Only if the machine allows it |
| Dose | Higher | At equal yield, weaker extraction | Last, if the basket doesn't suit it |
| Bean (roast, freshness) | Lighter, fresher | Changes the material, not the extraction | Once everything else is on target |
The gear that makes the diagnosis possible
None of these improves a coffee on its own. What they do is make the diagnosis repeatable. Without measurement you don't know whether the change you just made did anything, and without consistent puck prep you don't know whether the fault came from the setting or from how you filled the basket.
The scale is the first purchase, ahead of everything else. A kitchen scale reading whole grams isn't enough for an espresso ratio: two grams of drift on an eighteen-gram dose is already a different ratio. You want 0.1 g resolution and a timer, ideally sitting under the cup while the shot runs.
BAGAIL Balance Numérique à Café avec Minuterie, Précision 0.1 g
A WDT tool breaks up grind clumps. The name is the Weiss Distribution Technique, after the barista who popularized it. Freshly ground coffee clumps into little balls; the balls leave voids around them, and voids become channels under pressure. A few fine needles stirred through the basket before tamping disperses them. It's the most direct correction there is for trap one.
Normcore WDT Outil de Distribution V2 (9 aiguilles)
A tamper decides flatness, not force. A tilted tamp leaves one side of the basket less dense, and that's where the water goes. A self-levelling tamper takes that variable off the table by bottoming out on the rim, which helps early on, when you can't yet tell whether the inconsistency came from your wrist or from the setting.
NEOUZA Tampeur Expresso Auto-Nivelant 58 mm
The grinder is the variable, not the accessory. It's the only piece that gives you a fine, repeatable grind adjustment, and it also decides particle uniformity. A wide particle distribution produces over-extracted fines and under-extracted boulders at the same time, which is the bitter-and-sour signature above with no channel involved at all. A burr grinder is the floor. A blade grinder chops at random and can't be set.
Baratza Encore ESP Moulin à Café à Meules Coniques
TIMEMORE Chestnut C3s PRO - Moulin à café manuel
A bottomless portafilter makes channeling visible. A standard portafilter hides the extraction behind its spouts: all you see is what has already been blended together on the way out. A naked one exposes the underside of the basket, so a jet firing off at an angle, one patch blonding ahead of the rest, or a spray shooting sideways all show up instantly. It is the only tool on this list that tells you where the puck failed, not just that something went wrong.
Normcore Porte-filtre Nu Sans Fond 58 mm (panier 18 g inclus)
Descaler addresses a cause the grinder will never fix. Scale in the water circuit skews brew temperature and adds the same chalky bitterness to every shot, whatever you set. It is the first thing to rule out when a fault survives every step above.
durgol swiss espresso détartrant pour machines à café, 2 x 125 ml

BAGAIL Balance Numérique à Café avec Minuterie, Précision 0.1 g
View at Amazon (as of Aug 10)Affiliate link. Buying through it earns us a commission; the price stays the same for you.
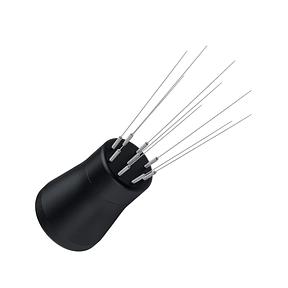
Normcore WDT Outil de Distribution V2 (9 aiguilles)
View at Amazon (as of Aug 10)Affiliate link. Buying through it earns us a commission; the price stays the same for you.
Not available in your region — closest match
View at Amazon (as of Aug 15)Affiliate link. Buying through it earns us a commission; the price stays the same for you.
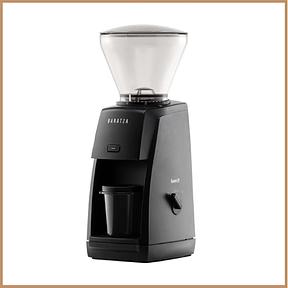
Baratza Encore ESP Moulin à Café à Meules Coniques
View at Amazon (as of Aug 11)Affiliate link. Buying through it earns us a commission; the price stays the same for you.
Not available in your region — closest match
Baratza Encore ESP Moulin à Café à Meules Coniques
View at Amazon (as of Aug 11)Affiliate link. Buying through it earns us a commission; the price stays the same for you.
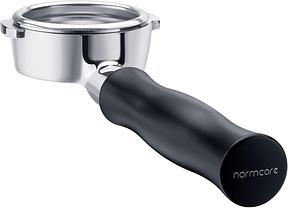
Normcore Porte-filtre Nu Sans Fond 58 mm (panier 18 g inclus)
View at AmazonAffiliate link. Buying through it earns us a commission; the price stays the same for you.
Not available in your region — closest match
View at Amazon (as of Aug 15)Affiliate link. Buying through it earns us a commission; the price stays the same for you.
When it's neither the grind nor the bean
Four causes no grinder setting will fix, and that everybody forgets.
Water. Very hard water gives flat cups and a chalky bitterness, on top of scaling the machine. Water that's too soft or demineralized does the opposite: naked acidity with no body behind it. It's a real variable with its own professional standards. If everything else is on target and the cup still tastes strange, test your water before adjusting further.
Bean freshness, in both directions. Coffee that has degassed too long loses its aromatics and gives a flat, bitter shot. Coffee that's too fresh, roasted only days ago, is still throwing off CO₂, which disturbs the water's path and destabilizes the flow. Which gives you, again, sour and bitter mixed together.
The basket and its capacity. A basket underfilled for its rated dose leaves excessive headspace, and the puck deforms under pressure. Overfill it and it touches the shower screen and gets stamped. Both produce an uneven extraction the grinder will never correct.
A dirty group head and shower screen. Coffee oils go rancid. An uncleaned group adds a constant stale bitterness to every shot, independent of any setting, and it's the classic case where people blame the bean by mistake. Regular group cleaning is part of the diagnosis, not optional housekeeping.
Further reading
Everything above assumes your machine lets you act on grind, dose and ratio. That isn't true everywhere. On many bean-to-cup machines several of those variables are locked, and your adjustment stops at the built-in grinder's coarseness scale. If you're still choosing, our bean-to-cup machine comparison covers which ones genuinely hand you those parameters, and the beginner buying guide explains which adjustments to insist on in an entry-level machine so you don't get stuck at the first disappointing cup.
Sources cited: Specialty Coffee Association, brewing control chart and espresso protocols; Specialty Coffee Association and World Coffee Research, Coffee Taster's Flavor Wheel, 2016; T. Hofmann et al., Technische Universität München, work on coffee bitter compounds presented at the American Chemical Society meeting, 2007.
All products from this post
The ones we named above are marked; the rest are alternatives in the same category.
Not available in your region — closest match
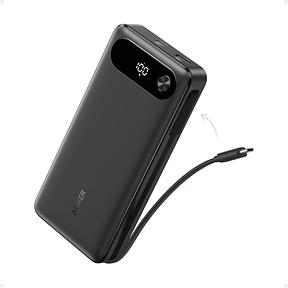
Anker Powerbank, 20.000mAh tragbares Ladegerät mit integriertem USB-C-Kabel, 87W Max Schnellladung, kompatibel mit MacBook, iPhone, Samsung und mehr
View at Amazon (as of Aug 15)
Not available in your region — closest match
Baratza Encore ESP Moulin à Café à Meules Coniques
View at Amazon (as of Aug 11)
Not available in your region — closest match
Anker Powerbank, 20.000mAh tragbares Ladegerät mit integriertem USB-C-Kabel, 87W Max Schnellladung, kompatibel mit MacBook, iPhone, Samsung und mehr
View at Amazon (as of Aug 15)Affiliate notice: As an Amazon Associate, we earn from qualifying purchases. Product prices and availability are subject to change.
Frequently Asked Questions
My espresso is bitter and sour at the same time. Is that possible?
Yes, and it's common. It nearly always means uneven extraction: the water tunneled through the puck instead of moving through it evenly. Coffee lining those channels gets stripped and turns bitter, while the rest of the bed is barely touched and stays sour. The fix isn't the grinder. It's puck prep: break the clumps, distribute the grounds, tamp flat.
How do I know whether it's the setting or the beans?
Extraction bitterness is rough and drying, and it moves when you change the grind by one step. Roast bitterness is smooth, even, and barely budges whatever you do. A very dark bean with an oily sheen on the surface is a reliable visual clue. If your ratio and time are on target and the bitterness won't move, the problem is in the bag.
Should I grind finer or coarser when the shot is sour?
Finer, but only after you've checked the brew ratio and the steadiness of the flow. A sour shot is under-extracted: a finer grind raises resistance, stretches contact time and pulls more out. One step at a time, remeasuring dose, yield and time between attempts. Change two things at once and the result tells you nothing.
Is acidity in the cup always a fault?
No. The flavor wheel published in 2016 by the SCA with World Coffee Research separates the Sour/Fermented family from the Fruity family: two distinct categories, not two strengths of one thing. Acidity with fruit behind it, lemon, apple, red berries, is a quality, and it's what light roasts are prized for. A sour shot is sharp without being aromatic and leaves nothing in the finish. Diluting the cup slightly settles the question.
Do the 15 or 19 bar on my machine change the taste?
No. That's a peak pump pressure quoted by the manufacturer, not the pressure your coffee extracts at. SCA espresso protocols take around 9 bar as the extraction reference. A machine advertised at 19 bar doesn't extract better. Grind, dose, ratio and puck prep are what decide the cup.
Can a blade grinder work for espresso?
Not reliably. A blade grinder chops the beans at random and produces very fine dust and coarse chunks at the same time. The fines over-extract while the chunks stay under-extracted, which gives you exactly the bitter-and-sour shot described above, and no setting corrects it. For espresso, an adjustable burr grinder is the minimum.